Deploying QuestDB on GCP
Quick reference
| Component | Recommended | Notes |
|---|---|---|
| Instance | c3-standard-4 or c3-highmem-8 | 4-8 vCPUs, 16-64 GiB RAM |
| Storage | Hyperdisk Balanced data disk, 300+ GiB | 5000 IOPS / 300 MBps for production |
| File system | ext4 | Or zfs with lz4 for on-disk compression |
| Ports | 9000, 8812, 9009, 9003 | Restrict to known IPs only |
Infrastructure
Plan your infrastructure before launching. This section covers instance types, storage, and networking requirements.
CPU/RAM
A production instance for QuestDB should be provisioned with at least 4 vCPUs and 8 GiB of memory. If possible,
a 1:4 vCPU/RAM ratio should be used. Some use cases may benefit from a 1:8 ratio, if this means that all the working
set data will fit into memory; this can increase query performance by as much as 10x.
It is not recommended to run production workloads on less than 4 vCPUs, as below this number, parallel querying optimisations
may be disabled. This is to ensure there is sufficient resources available for ingestion.
Architecture
QuestDB should be deployed on Intel/AMD architectures i.e. x86_64 and not on ARM i.e. aarch64. Some optimisations are not available
on ARM, e.g. SIMD.
Storage
Data should be stored on a data disk with at minimum 3000 IOPS/125 MBps, and ideally at least 5000 IOPS/300 MBps. Higher end workloads should scale up the disks appropriately, or use multiple disks if necessary.
It is also worth checking the burst capacity of your storage. This capacity should only be used during heavy I/O spikes/infrequent out-of-order (O3) writes. It is useful to have in case you hit unexpected load bursts.
Instance sizing
| Workload | Instance | vCPUs | RAM | Use case |
|---|---|---|---|---|
| Development | c3-standard-4 | 4 | 16 GiB | Testing, small datasets |
| Production (starter) | c3-highmem-4 | 4 | 32 GiB | Light ingestion, moderate queries |
| Production (standard) | c3-highmem-8 | 8 | 64 GiB | High ingestion, complex queries |
| Production (heavy) | c3-highmem-22 | 22 | 176 GiB | Heavy workloads, large datasets |
Choosing an instance family:
Start with C3 (Intel Xeon) or C3D (AMD EPYC) instances. Both perform
similarly for QuestDB. Choose based on availability and pricing in your region.
You can use the highcpu, standard, and highmem variants to adjust the
RAM-to-vCPU ratio between 2:1, 4:1, and 8:1. Higher RAM can improve query
performance dramatically when it lets your working set fit entirely in memory.
Do not use instances containing the letter A, such as C4A. These are
ARM architecture instances using Axion processors. QuestDB's JIT compilation and
SIMD optimizations are limited on ARM. Deploy on x86_64 instances and an
x86_64 Linux distribution such as Ubuntu.
Storage
Use Hyperdisk Balanced
volumes for QuestDB data, provisioned at 5000 IOPS / 300 MBps until you have
tested your workload. Keep the OS disk separate from the QuestDB data disk, and
mount the data disk at /var/lib/questdb.
| Workload | Disk | Size | IOPS | Throughput |
|---|---|---|---|---|
| Development | Hyperdisk Balanced | 100 GiB | 3000 | 140 MBps |
| Production | Hyperdisk Balanced | 300+ GiB | 5000 | 300 MBps |
| High I/O | Hyperdisk Balanced | 500+ GiB | 5000+ | 300+ MBps |
Hyperdisk Balanced is not supported on all machine types. N2 instances do not support Hyperdisk. Use N4, C3, or C4 series instances with Hyperdisk Balanced.
Hyperdisk Extreme generally requires much higher vCPU counts. For example, it
cannot be used on C3 machines smaller than 88 vCPUs.
File system:
Format the data disk as ext4. If you need on-disk compression, use zfs with
lz4 instead, at a small performance cost. See
ZFS compression.
Unsupported storage:
- Filestore - Not supported as primary storage (NFS latency too high). Use for Enterprise replication only (see Enterprise on GCP).
- Google Cloud Storage - Not supported as primary storage. Use for Enterprise replication only.
Networking
Firewall rules:
| Port | Protocol | Source | Purpose |
|---|---|---|---|
| 22 | TCP | Your IP | SSH access |
| 9000 | TCP | Your IP / VPC | Web Console & REST API |
| 8812 | TCP | Your IP / VPC | PostgreSQL wire protocol |
| 9009 | TCP | Application servers | InfluxDB line protocol |
| 9003 | TCP | Monitoring servers | Health check & Prometheus |
The firewall rule below opens only 9000 and 8812. Add 9009 only if you ingest over ILP, and reach 9003 from within the VPC or over SSH rather than exposing it publicly.
Never expose ports 9000, 8812, or 9009 to 0.0.0.0/0. Restrict access to known
IP ranges or use an Identity-Aware Proxy (IAP) bastion.
VPC recommendations:
- Deploy QuestDB in a private subnet
- Use Cloud NAT for outbound access (package updates, etc.)
- Use a network tag (this guide uses
questdb) so one firewall rule applies to every QuestDB instance you create - Use Private Google Access for GCS if using Enterprise replication
Deployment
Deploy QuestDB on a Google Compute Engine virtual machine.
Deploying QuestDB as a container at VM creation (the Deploy Container option on Compute Engine) is no longer supported. Create a standard Linux VM and install QuestDB over SSH as described below.
Prerequisites
- A Google Cloud Platform account and a GCP project
- The Compute Engine API enabled for that project
- An SSH key registered with your project or account
- The Google Cloud CLI if you want
to use the
gcloudcommands instead of the console - A client source CIDR for firewall rules, such as your workstation IP address
with
/32. Do not use0.0.0.0/0for QuestDB ports.
Create the VM
- In the Google Cloud Console, navigate to Compute Engine and click Create Instance
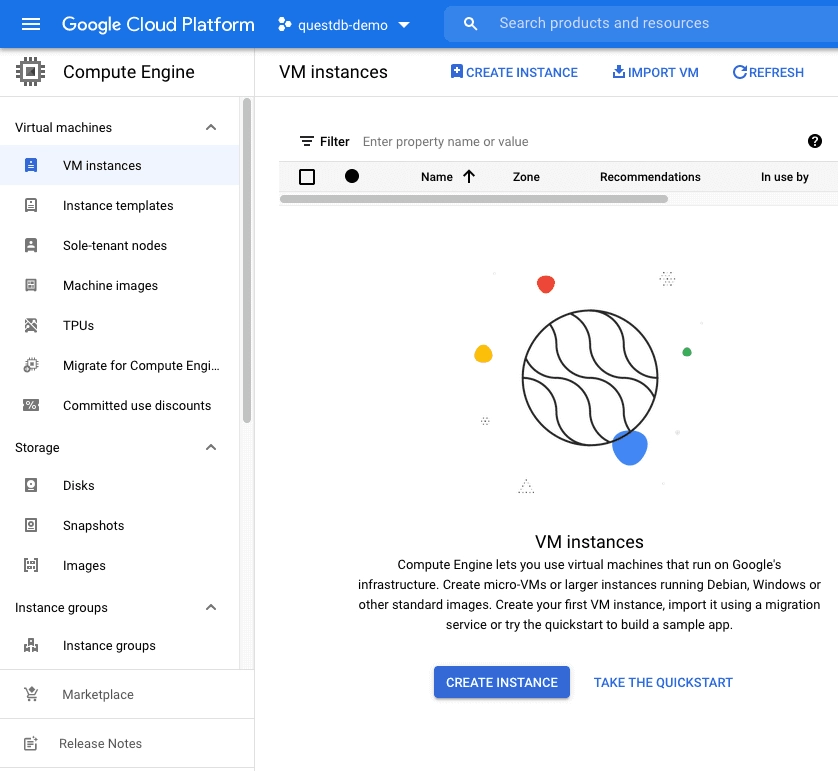
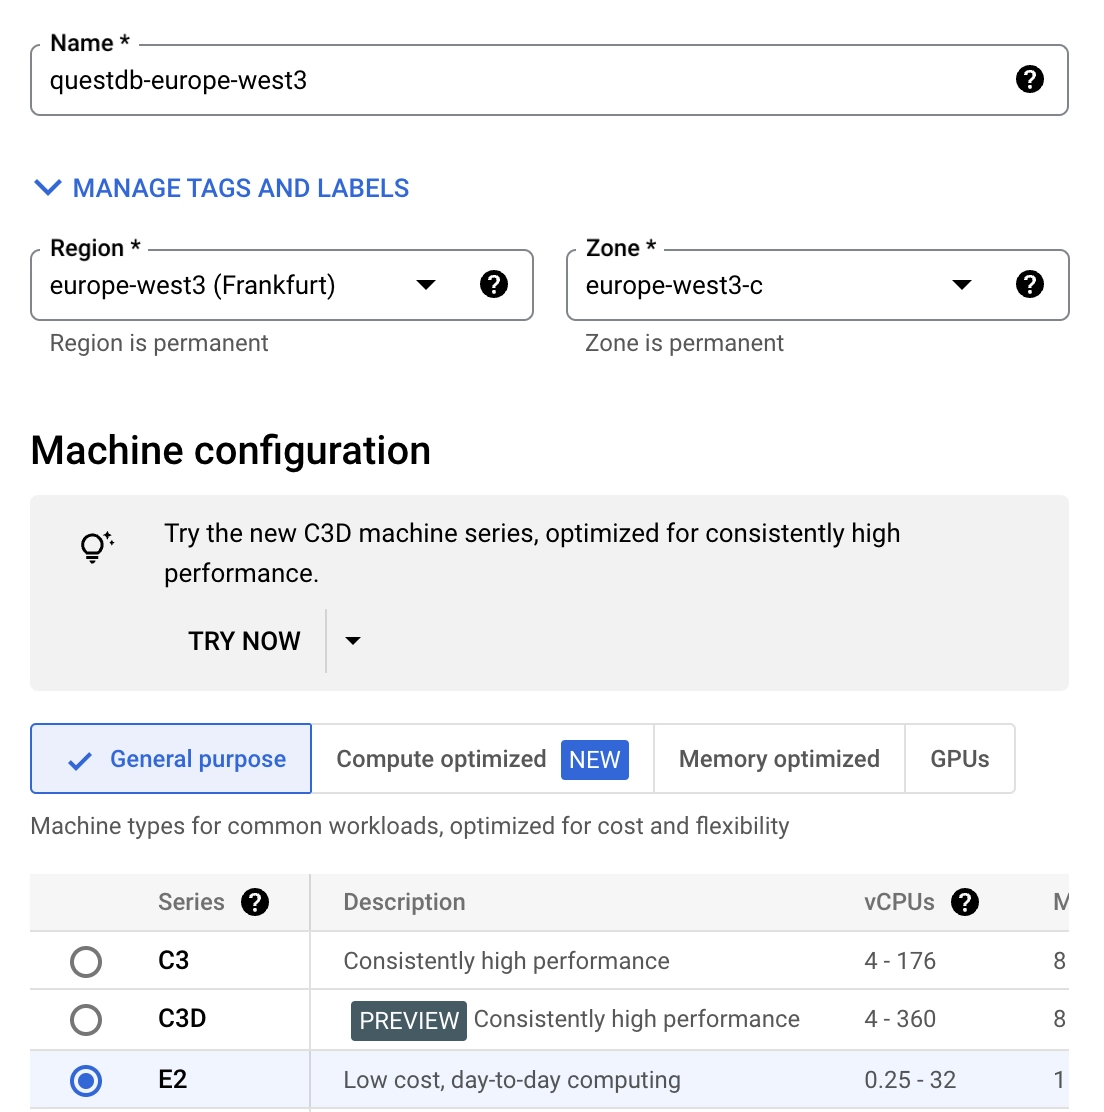
- Give the instance a name. This example uses
questdb-europe-west3 - Choose a Region and Zone. This example uses
europe-west3 (Frankfurt)and the default zone - Select a machine configuration (see Instance sizing)
- Under Boot disk, click Change and choose Ubuntu 24.04 LTS (x86/64) as the image
- Set the boot disk type to Hyperdisk Balanced and the size to
30 GiB - Add a separate blank Hyperdisk Balanced data disk:
- Set Name to
questdb-data - Set Size to
300 GiBfor production, or100 GiBfor development - Set Provisioned IOPS to
5000 - Set Provisioned throughput to
300 MBps - Set Deletion rule to Keep disk if you want the data disk to survive instance deletion
- Set the device name to
questdb-data
- Set Name to
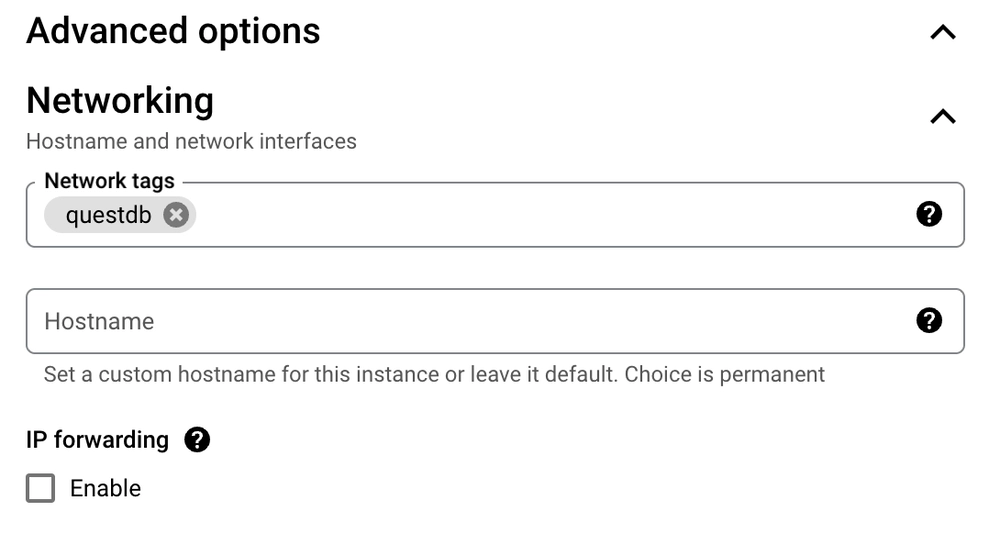
Before creating the instance, assign it a Network tag so a firewall rule can expose the QuestDB ports:
- Expand the Advanced options menu, then expand the Networking panel
- Add a Network tag to identify the instance. This example uses
questdb
Click Create at the bottom of the dialog to launch the instance.
If you prefer Cloud Shell or another shell with gcloud configured, this is the
equivalent VM and disk setup:
export QDB_INSTANCE="questdb-europe-west3"
export QDB_ZONE="europe-west3-a"
export QDB_MACHINE_TYPE="c3-standard-4"
export QDB_TAG="questdb"
export QDB_DISK="questdb-data"

gcloud compute instances create "$QDB_INSTANCE" \
  --zone "$QDB_ZONE" \
  --machine-type "$QDB_MACHINE_TYPE" \
  --image-family "ubuntu-2404-lts-amd64" \
  --image-project "ubuntu-os-cloud" \
  --boot-disk-size "30GiB" \
  --boot-disk-type "hyperdisk-balanced" \
  --tags "$QDB_TAG"

gcloud compute disks create "$QDB_DISK" \
  --zone "$QDB_ZONE" \
  --size "300GiB" \
  --type "hyperdisk-balanced" \
  --provisioned-iops "5000" \
  --provisioned-throughput "300" \
  --access-mode "READ_WRITE_SINGLE"

gcloud compute instances attach-disk "$QDB_INSTANCE" \
  --zone "$QDB_ZONE" \
  --disk "$QDB_DISK" \
  --device-name "$QDB_DISK"
Create a firewall rule
The network tag lets a single firewall rule apply to this instance and any future QuestDB instances you create with the same tag.
- Navigate to the Firewall configuration page under Network Security → Firewall policies
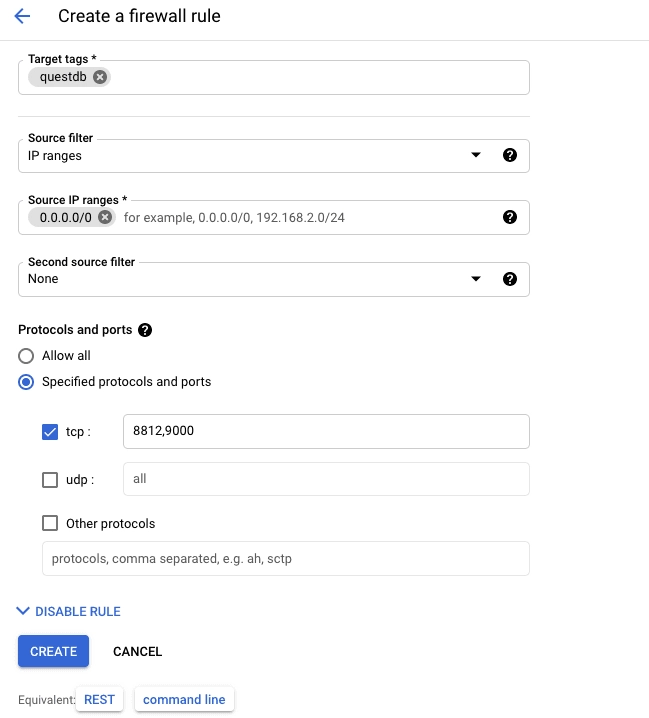
- Click Create firewall rule
- Enter
questdbin the Name field - Under Targets, select Specified target tags and enter
questdbin Target tags - Under Source filter, enter the IP range this rule applies to. Restrict
this to your own IP range rather than
0.0.0.0/0(see Networking) - Under Protocols and ports, select Specified protocols and ports,
check TCP, and enter
8812,9000 - Click Create
Only add port 9009 if you need ILP ingestion, and restrict the source to your application servers.
The equivalent gcloud command is:
export QDB_ALLOWED_SOURCE="YOUR_CLIENT_IP/32"

gcloud compute firewall-rules create "questdb-client-access" \
  --network "default" \
  --target-tags "questdb" \
  --source-ranges "$QDB_ALLOWED_SOURCE" \
  --allow "tcp:9000,tcp:8812"
Connect to the VM
Connect to the instance over SSH. You can use the SSH button on the
VM Instances page, or
connect with gcloud:
gcloud compute ssh questdb-europe-west3 --zone europe-west3-a
Prepare the data disk
Run these commands on the VM over SSH. They assume the attached data disk uses
the custom device name questdb-data and format it as ext4, which is the
recommended default. If you need on-disk compression, format the data disk as
zfs with lz4 instead. See ZFS compression.
The mkfs.ext4 command erases the target device. Run it only on a new blank
data disk, and verify that the device path points to the data disk before
formatting.
export QDB_ROOT="/var/lib/questdb"
export QDB_DATA_DEVICE="/dev/disk/by-id/google-questdb-data"

ls -l "$QDB_DATA_DEVICE"

sudo mkfs.ext4 -m 0 -E lazy_itable_init=0,lazy_journal_init=0,discard "$QDB_DATA_DEVICE"
sudo mkdir -p "$QDB_ROOT"
sudo mount -o discard,defaults "$QDB_DATA_DEVICE" "$QDB_ROOT"
QDB_DATA_UUID="$(sudo blkid -s UUID -o value "$QDB_DATA_DEVICE")"
echo "UUID=$QDB_DATA_UUID $QDB_ROOT ext4 discard,defaults,nofail 0 2" | sudo tee -a /etc/fstab
sudo chown "$USER:$USER" "$QDB_ROOT"
findmnt "$QDB_ROOT"
After this step, QuestDB configuration, logs, and table data will live under
/var/lib/questdb.
Install QuestDB
Download QuestDB and start it with /var/lib/questdb as the QuestDB root
directory:
wget https://github.com/questdb/questdb/releases/download/9.4.3/questdb-9.4.3-rt-linux-x86-64.tar.gz
tar xzf questdb-9.4.3-rt-linux-x86-64.tar.gz
cd questdb-9.4.3-rt-linux-x86-64/bin
./questdb.sh start -d /var/lib/questdb
./questdb.sh status -d /var/lib/questdb
Access the Web Console at http://<external-ip>:9000, using the instance's
External IP from the VM Instances page.

You can also send a request to the REST API on port 9000:
curl -G \
  --data-urlencode "query=SELECT * FROM telemetry_config" \
  "http://<external-ip>:9000/exec"
The deployment is working when:
questdb.sh status -d /var/lib/questdbreports the service as runningcurl http://localhost:9003/statusreturnsStatus: Healthyfrom the VMhttp://<external-ip>:9000loads the Web Console from an allowed source IP
For production deployments, use systemd to manage the QuestDB service.
Security
Change default credentials
Update credentials immediately after deployment.
Web Console and REST API - edit conf/server.conf:
http.user=your_username
http.password=your_secure_password
PostgreSQL - edit conf/server.conf:
pg.user=your_username
pg.password=your_secure_password
InfluxDB line protocol - edit conf/auth.json. See
ILP authentication.
Restart after changes:
./questdb.sh stop -d /var/lib/questdb
./questdb.sh start -d /var/lib/questdb
Disable unused interfaces
Reduce attack surface by disabling protocols you don't use:
pg.enabled=false           # Disable PostgreSQL
line.tcp.enabled=false     # Disable ILP
http.enabled=false         # Disable Web Console & REST API
http.security.readonly=true  # Or make HTTP read-only
Operations
Upgrading
-
Stop QuestDB:
./questdb.sh stop -d /var/lib/questdb -
Back up your data directory
-
Download and extract the new version:
wget https://github.com/questdb/questdb/releases/download/9.4.3/questdb-9.4.3-rt-linux-x86-64.tar.gz
tar xzf questdb-9.4.3-rt-linux-x86-64.tar.gz
- Start the new version:
cd questdb-*/bin
./questdb.sh start -d /var/lib/questdb
Monitoring
Health check:
curl http://localhost:9003/status
Prometheus metrics:
curl http://localhost:9003/metrics
Cloud Monitoring integration:
Use the Ops Agent to collect:
- VM metrics (CPU, memory, disk I/O)
- QuestDB logs from the
log/directory - Custom metrics from the Prometheus endpoint
Enterprise on GCP
QuestDB Enterprise adds production features for GCP:
- GCS replication - Continuous backup for durability
- Cold storage - Move old partitions to GCS, query on-demand
- High availability - Automatic failover across instances
GCP offers two low-latency NFS services that can act as a replication transport
via the fs:: prefix, as an alternative to GCS:
- Google Filestore - a managed NFS service. The
fs::transport over NFS provides sub-200ms replication lag with aggressive tuning, compared to ~1s+ with the GCS object store transport. - NetApp Volumes - a managed NFS service backed by NetApp ONTAP. The QuestDB configuration is identical to Filestore.
To use Filestore or NetApp Volumes for replication:
- Create the instance in the same region as your QuestDB VMs
- Mount the NFS share on both primary and replica nodes
- Configure the
fs::transport inserver.conf:
replication.object.store=fs::root=/mnt/questdb-repl/final;atomic_write_dir=/mnt/questdb-repl/scratch;
Use the backup feature to manage WAL file retention
on the NFS mount. On GKE, expose the share as a PersistentVolume with
ReadWriteMany access mode using the
Filestore CSI driver
so both primary and replica pods can mount it simultaneously.
Filestore Zonal and Basic SSD tiers may require a
quota increase before use,
and NetApp Volumes requires enabling the netapp.googleapis.com API.
For GCS replication, create a bucket for the database, then follow the Enterprise Quick Start to create a connection string and configure QuestDB.